
How To Use Gmail With Your Own Custom Domain for Free [2025]
One of the first things people like to do after registering a domain name is set up a custom email address. A custom email address uses your domain instead of a free one like gmail.com or hotmail.com. Using your own domain for email looks much more professional, especially if you’re running a business or non-profit organization.
There are two ways to use a custom domain with Gmail. The most common way is by using a paid option called Google Workspace (also referred to as G Suite) which offers email in addition to a suite of productivity tools. The second, lesser-known option, is configuring a regular free Gmail account to send and receive with your custom domain.
Let’s dive into the free option now!
Prerequisites
You’ll need a few things before getting started:
- Domain name
- Web hosting
- Email address using your domain name at your web hosting company
- Free Gmail account
If you don’t currently have a domain name or web hosting, many providers like InMotion and Hostinger include a free domain name (for the first year) when you sign up for their hosting.
Step #1 – Create A Free Gmail Account
Once you’ve signed up for your own domain name and web hosting, you’ll need to create a free Gmail account if you don’t currently have one.
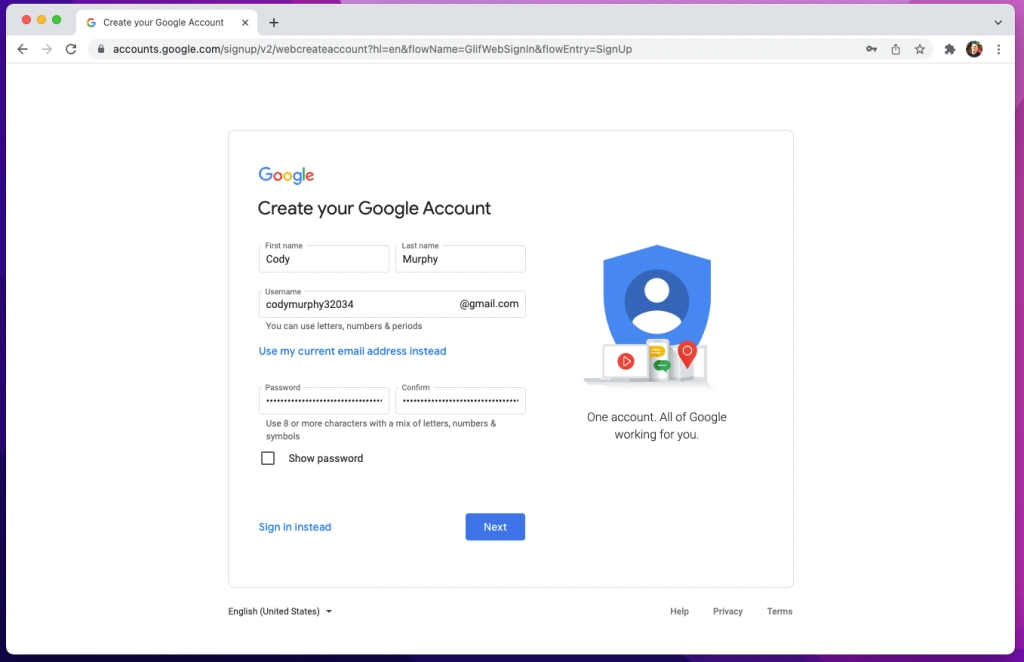
While Google requires you to provide your First and Last Name, many people choose to enter their business name for these fields. In the example below, instead of using my name, I could have simply entered Visual Oak.
In addition to your name, you’ll need to select a Username and Password. Your Username will also be your Google-branded email address, so spend some time selecting the one that closest resembles your business name.
Unfortunately, since Gmail is so popular, your first choice may not be available. In that situation, you may want to consider adding something related to the city or state you operate in after your first choice. For example, if oakpizza@gmail.com wasn’t available, I could try oakpizza90026@gmail.com, which includes the zip code of my neighborhood.
Once you’ve created your Google Account, it’s time to log in to Gmail for the first time and configure it to use your own domain name!
Step #2 – Navigate to Your Gmail Settings
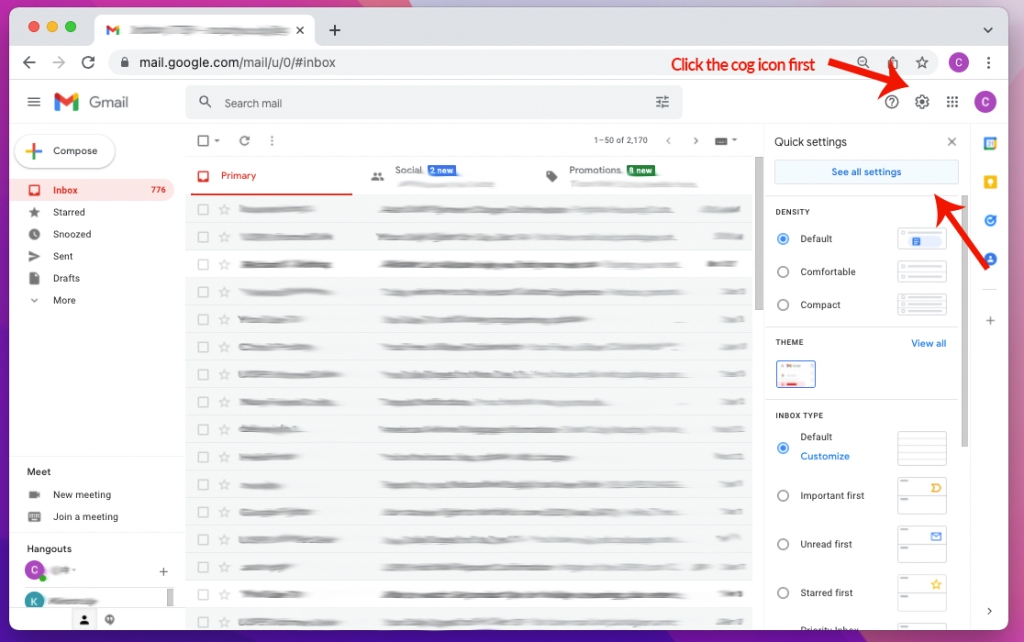
Once you’ve created your free Google account, it’s time to head over to your Gmail inbox. Simply go to https://www.gmail.com.
In the top right-hand corner, there will be a cog icon. Click that and then the see all settings button.
Step #3 – Link Your Custom Email Address
Once you’re in your Gmail settings, navigate to the Accounts and Import tab. This is where we’re going to add your custom email address.
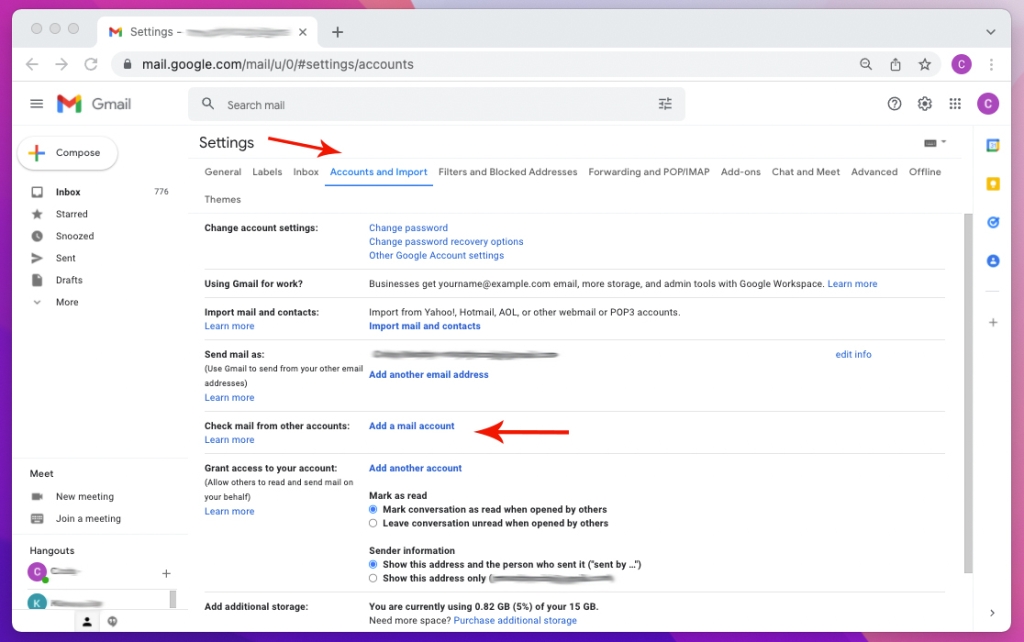
Halfway down this page, there is a section that says check mail from other accounts. Click add a mail account and a popup will open that will guide you through the process of adding your custom email address to Gmail.
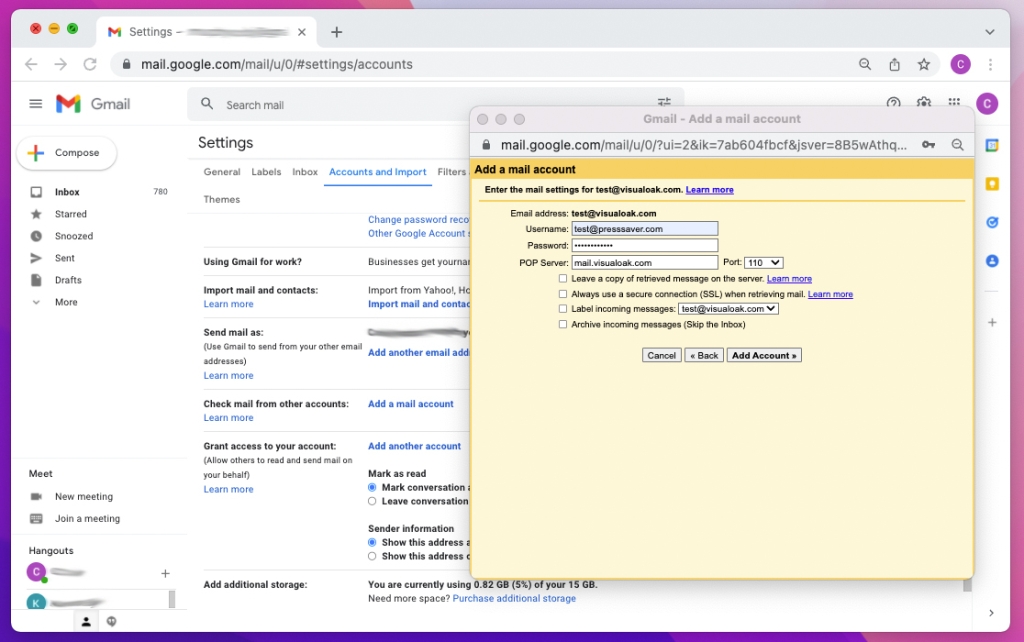
Enter your email address and then select Import emails from my other account (POP3) on the next page. You’ll then see a form to log in to your business email account.
If your web hosting provider uses cPanel, you’ll want to enter your full email address for the username. All of the other settings can be left as-is. Some people will prefer to leave a copy of retrieved messages on the server but be aware that can use unnecessary storage to your web hosting account (your messages will be safe on Google’s servers).
Once Google has been able to connect to your custom email address, they will send a verification email to confirm it is yours. That email will contain a verification code that needs to be entered back into your Gmail settings.
After you’ve completed that step, congratulations, your custom email address is officially linked to Gmail — for free! 🎉


![How to Cancel Bluehost and Get a Refund [2025]](https://www.visualoak.com/wp-content/uploads/2022/07/cancel-bluehost-refund-768x428.jpg)