
How to Add and Edit The Header in Google Docs [2023]
When creating documents like academic papers and business reports you need to adjust various elements besides the main body content. These elements include things like the title of the section, information about the author, page number, and more. Some of these elements are placed inside headers or footers, which begs the question… how do you add or edit them?!
Google Docs lets you add and edit headers to enter all relevant elements into your document. In this article, we will give you a step-by-step guide on how to add/edit a header in Google Docs. This will help you create, edit, and format headers just the way you want them. Let’s get going!
How to Add a Header in Google Docs
Headers can be created in two ways. We will discuss both and break them down into simpler steps. Here you go.
Adding a Header from the Insert Menu
Follow these steps to add a header in Google Docs using the Insert menu.
Step 1: Create a new document or open an existing one. We have opened our Test Document for visual references.
Step 2: Click on the Insert menu. Hover your mouse over Headers & footers. This will open a sub-menu on the right and select Header from the sub-menu.
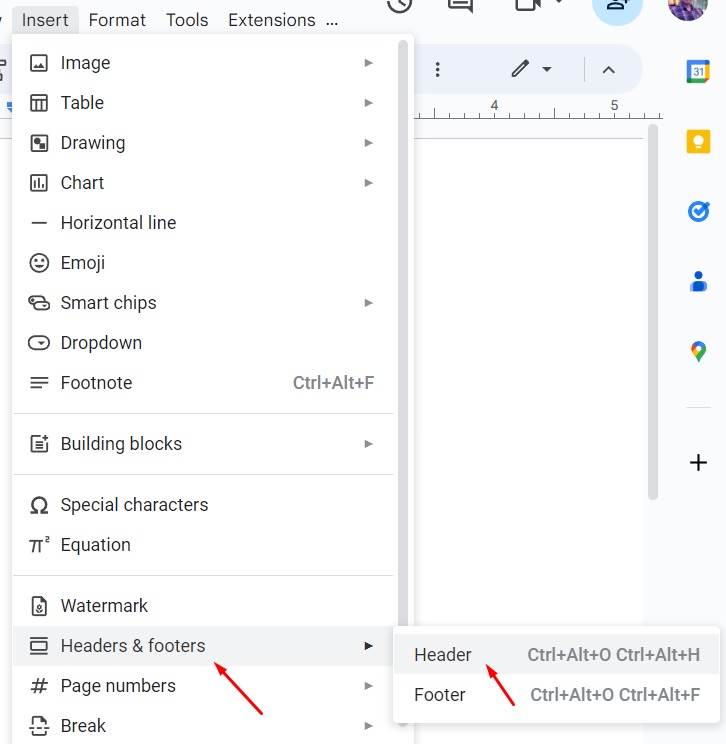
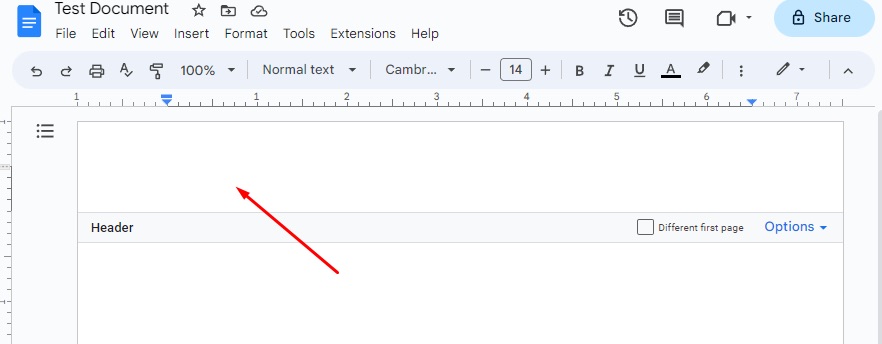
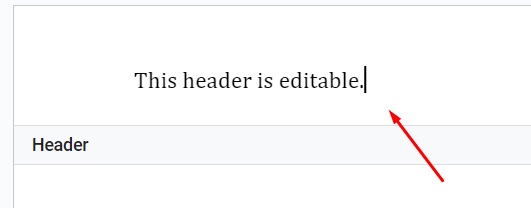
Step 3: The header will appear in your document like the following image.
Adding a Header Using Shortcut Keys
You can also create headers without browsing the Insert menu. If you look at the sub-menu in the previous method closely, you would notice shortcuts for creating headers.
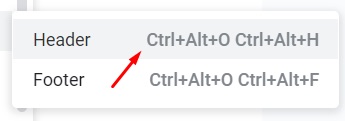
This might be a bit confusing for some users. You need to press and hold the Ctrl and Alt keys together. Press O first and then press H. This will create a header in your Google Docs; these keys are for Windows computers.
If you are using MacOS, you need to press and hold Ctrl and Cmd keys together. O and H will be the same.
Adding a Heading Using the Mouse
You don’t even need to use shortcut keys to create headers. In this method, you just need to double-click the empty space on top of the cursor.
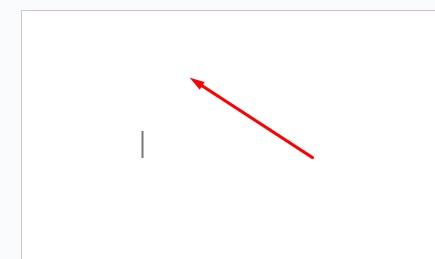
If you look closely, we have placed the cursor at the beginning of our document. Hover your mouse over the empty space on top of the cursor, which is also known as the margin. Double-click the left mouse button, and a header will be created in your Google Docs.
How to Edit a Header or Footer in Google Docs
You don’t have to do anything to edit your header. Simply click on the header, and the cursor will appear; you can enter whatever information you want.
There are different formatting options that you might need to edit. We will give a detailed overview of those options here.
Formatting the Header
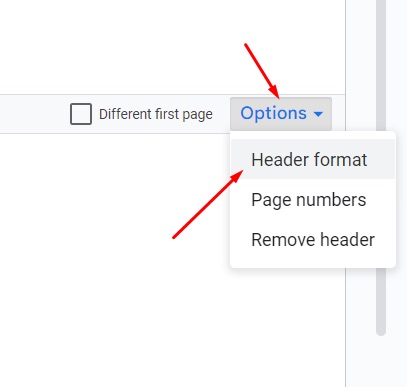
Step 1: On the right side of the header, you will find a drop-down menu called Options. Click on that menu and select Header format; the header format dialog box will open.
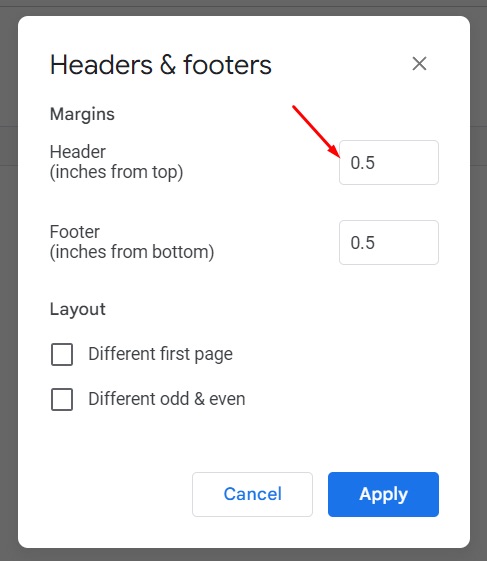
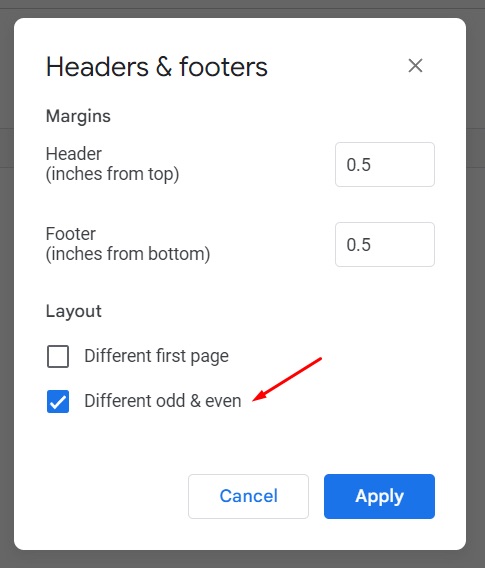
Step 2: You can choose a margin for the header. This will denote how many inches the margin will be from the top of the page. We have 0.5 inches here, for example. After you input your desired margin, click Apply.
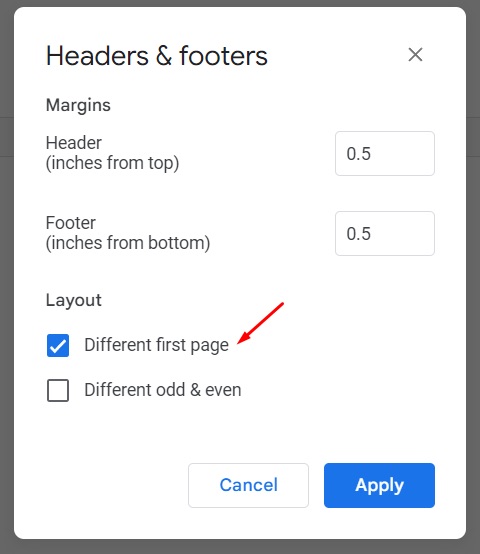
Step 3: Whatever you write in the header section appears on all pages of that document by default. If you want to use a different header for the first page of your document, you need to check the Different first page box from the Layout option.
Step 4: If you want to use different headers for even and odd-numbered pages, you should click the Different odd & even box from the Layout option.
Inserting Page Numbers
If you want to include page numbers in your header, that can be done from the Options drop-down menu.
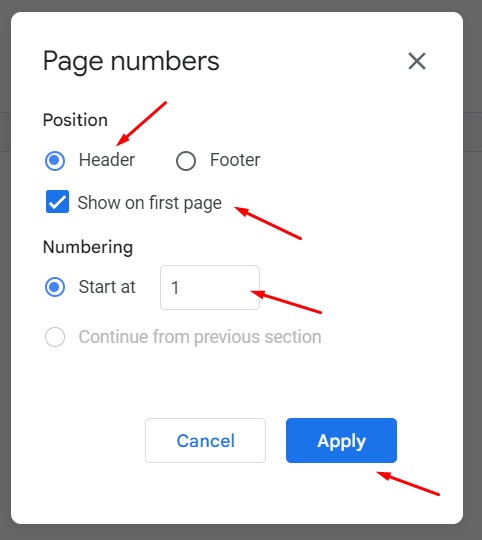
Step 1: Click on the drop-down menu and select Page numbers. This will open the Page numbers dialog box.
Step 2: You will need to select the Header radio button under Position. Then, click the Show on first page checkbox to start your page numbers for the first page, but if you don’t want the number to be shown on the first page, you can uncheck the box and select the number you want to start from. For example, you can insert 1 and uncheck the above box if you want to start numbering from the second page. Once everything is okay, click Apply.
How to Remove Header from Google Docs?
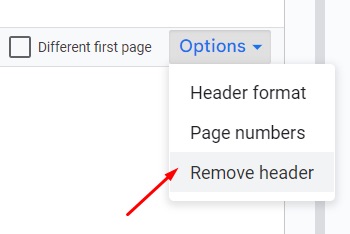
If you don’t want the header anymore in your document, you can simply click the Option drop-down menu and select Remove header. Once you click that, the header will be removed from your document.
Final Thoughts on Editing Headers in Google Docs
Putting additional information in headers can increase the visual appearance of any formal document. This sometimes becomes a necessity to add different elements to headers, such as page numbers, sections, or other important information. You must create a header first to add that information in.
We created this guide on how to add/edit a header in Google Docs so that you can easily create headers. This guide shows three effective methods of creating headers in Google Docs. Besides creating headers, you also learn to edit various options and format your headers to match the intent of your document. Adding page numbers or removing headers from your document are also shown here.
Visual references included in this guide should help you stay on the same page with us. We hope you will be able to create/edit headers in Google Docs from now on.
![How to Turn Off Trending Searches on Google [2023]](https://www.visualoak.com/wp-content/uploads/2023/05/turn-off-trending-searches-768x411.jpg)
![How to Transfer Ownership of a Google Doc [2023]](https://www.visualoak.com/wp-content/uploads/2023/06/how-to-transfer-ownership-google-docs-768x411.jpg)
![How to Add Fonts to Google Docs [2023]](https://www.visualoak.com/wp-content/uploads/2023/06/install-add-fonts-to-google-docs-768x411.jpg)
![How to Assign Tasks in Google Docs [2023]](https://www.visualoak.com/wp-content/uploads/2023/05/how-to-assign-tasks-google-docs-768x411.jpg)
![How to Add Code to Google Docs [2023]](https://www.visualoak.com/wp-content/uploads/2023/05/install-code-blocks-google-docs-768x411.jpg)
![How to Create an Outline in Google Docs [2023]](https://www.visualoak.com/wp-content/uploads/2023/05/how-to-create-outlines-google-docs-768x411.jpg)